As Rosh Hashanah approaches this year, I am being drawn to cooking with the traditional foods – dates, honey, apples… So, I decided to make a date challah for this Shabbat. Here’s what it looked like when I did the original post in 2013:
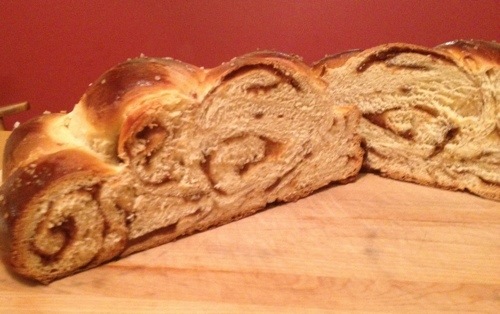
I made just a couple of tweaks when I made it on Friday. First, I used silan (date molasses) in place of the 1 teaspoon of honey to feed the yeast. But the main difference, and effort saver, was that I used a package of baking dates for the filling. I happened to have a package in my pantry that had been sitting there waiting for a use. As I was about to use it to make the filling, I realized that it was already in paste form, so I could just skip that step. There was more filling in the package than what the original recipe would make, but I still used it all. The result is a bread that is even more date-forward.
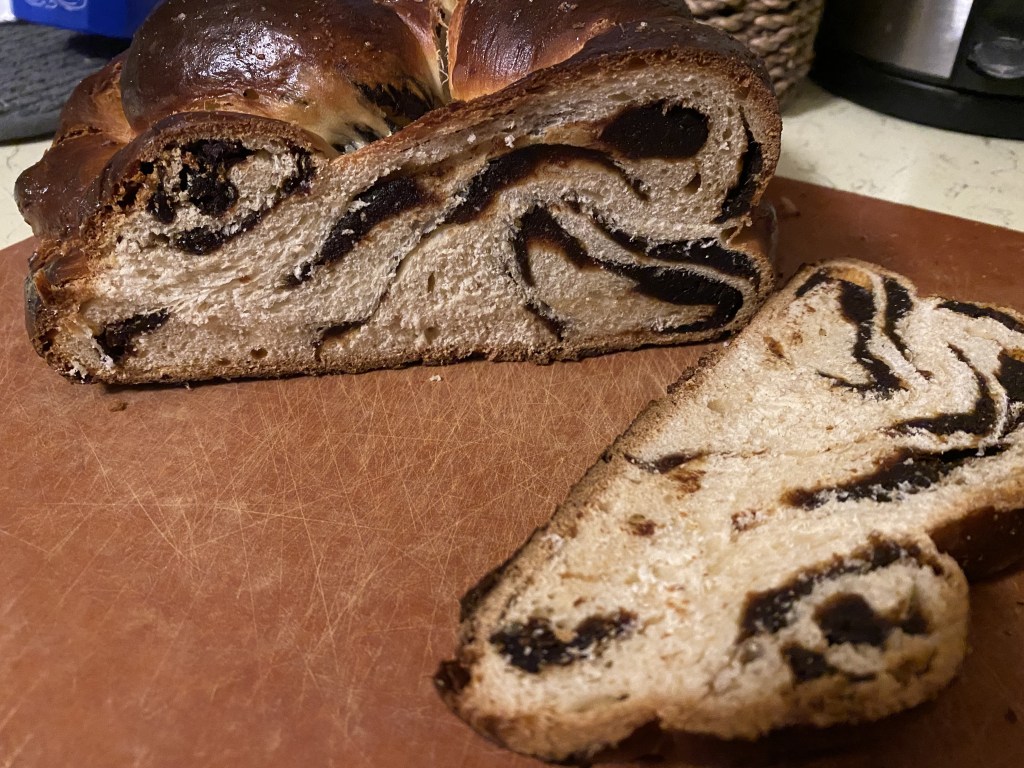
As you can see, I did not spread the dates to an even, thin layer this time. I would have had to add more moisture to the baking dates to do that, and I think it would have negatively impacted the bread texture. I have to tell you, this made for a delicious breakfast just simply spread with some butter (or vegan spread as we use).
You can check out the original recipe here. Here is what I did this time…
DATE CHALLAH
Bread
2 1/4 teaspoons (1 packet — 1/4 ounce or 7 grams) active dry yeast
1/4 cup plus 1 teaspoon honey
1/3 cup olive oil, plus more for the bowl
2 large eggs (from Farmer Kim)
2 teaspoons coarse sea salt
4 cups all-purpose flour
Date Filling
1 package baking dates
Egg wash
1 large egg
Coarse sea salt, for sprinkling
Directions
The night before baking: Whisk the yeast and 1 teaspoon honey into 2/3 cup warm water (110 to 116 degrees), and let it stand for a few minutes, until foamy. In a large mixer bowl, combine the yeast mixture with remaining honey, 1/3 cup olive oil, and eggs. Add the salt and flour, and mix until dough begins to hold together. Switch to a dough hook, and run at low speed for 5 to 8 minutes. Transfer the dough to an olive-oil coated bowl (or rest the dough briefly on the counter and oil your mixer bowl to use for rising, so that you’ll use fewer dishes), cover with plastic wrap, and place in the refrigerator for up to 24 hours, or until almost doubled in size.
Insert dates: After your dough has risen, remove it from the refrigerator and let the bowl sit on the counter for 20-30 minutes. Turn it out onto a floured surface and divide it in half. Roll the first half of the dough into a wide rectangle. Spread half the date filling as evenly as possible over the dough.
Roll the dough into a long, tight log, trapping the filling within. Then gently stretch the log as wide as feels comfortable and divide it in half. Repeat with remaining dough and date filling.
Weave your challah: Arrange two ropes in each direction, perpendicular to each other, like a tight tic-tac-toe board. Weave them so that one side is over, and the other is under, where they meet.

So, now you’ve got an eight-legged woven-headed octopus. Take the four legs that come from underneath the center and move the leg to their right — i.e., jumping it. Take the legs that were on the right and, again, jump each over the leg before, this time to the left.

If you have extra length in your ropes, you can repeat these left-right jumps until you run out of rope. Tuck the corners or odd bumps under the dough with the sides of your hands to form a round .
Transfer the dough to a parchment-cover heavy baking sheet. Let challah rise for another hour, but 45 minutes into this rise, preheat your oven to 375°F.
Bake your loaf: Before baking, Beat egg until smooth, and brush over challah. Sprinkle with sea salt.
Bake in middle of oven for 35 to 45 minutes. Check the loaf after about 20 – 25 minute, if it starts getting too dark too quickly, cover it with foil for the remainder of the baking time. The very best way to check for doneness is with an instant-read thermometer — the center of the loaf should be 195 degrees.
Cool loaf on a rack before serving. Enjoy!
Makes one large loaf.

